Technical Resources and Training

Hands reviewing bathroom installation plans on a table
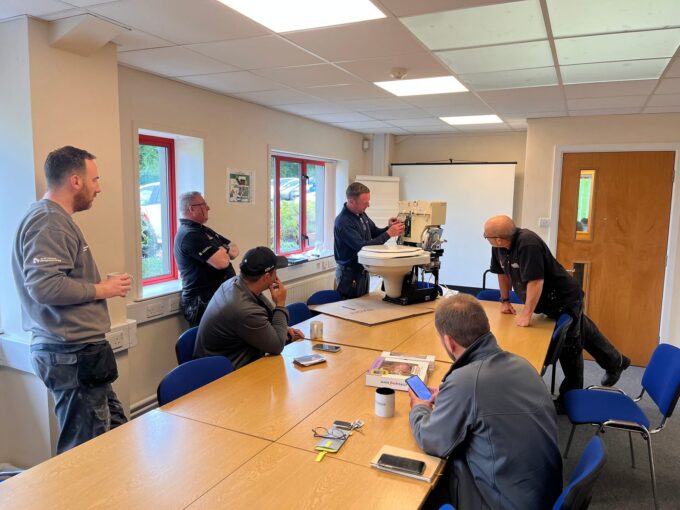
Training session in a meeting room with a Closomat toilet

Technical Support Backed by Decades of Accessible Bathroom Expertise

We don’t replace the competency or responsibility of the installer. Instead, we provide specialist product knowledge, technical guidance and practical advice to help your team deliver successful installations first time.
Installation of a Closomat Palma Vita
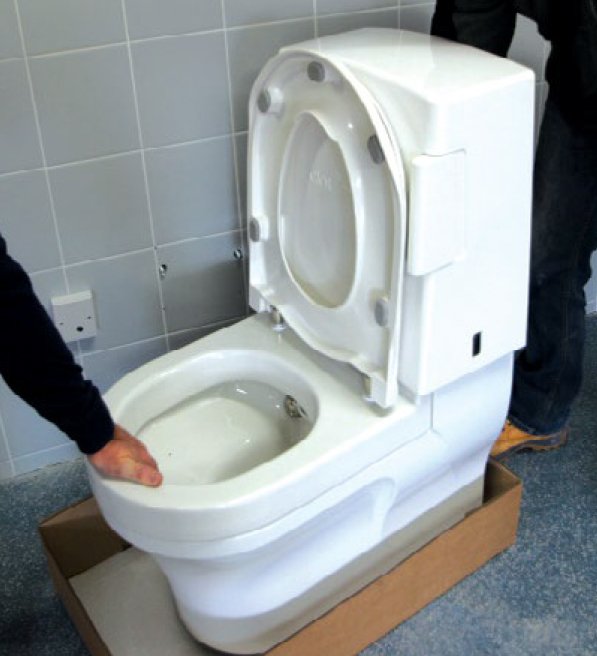
Lifting the Closomat Palma Vita out of its packaging by the flushing edge and rear frame
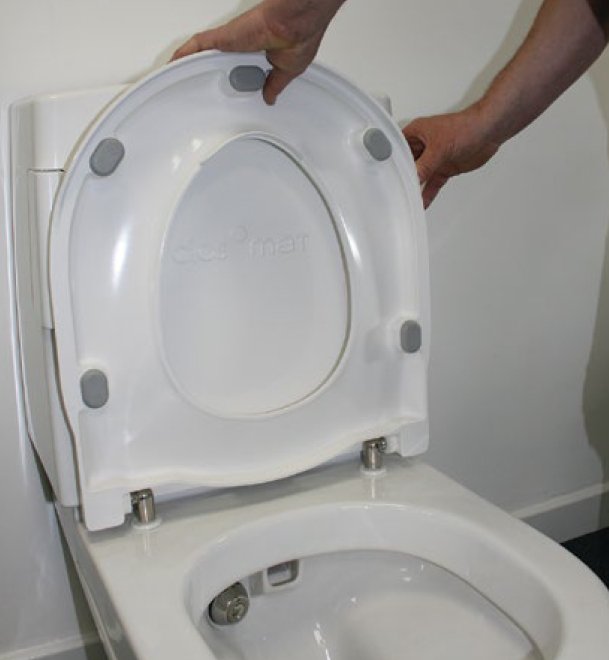
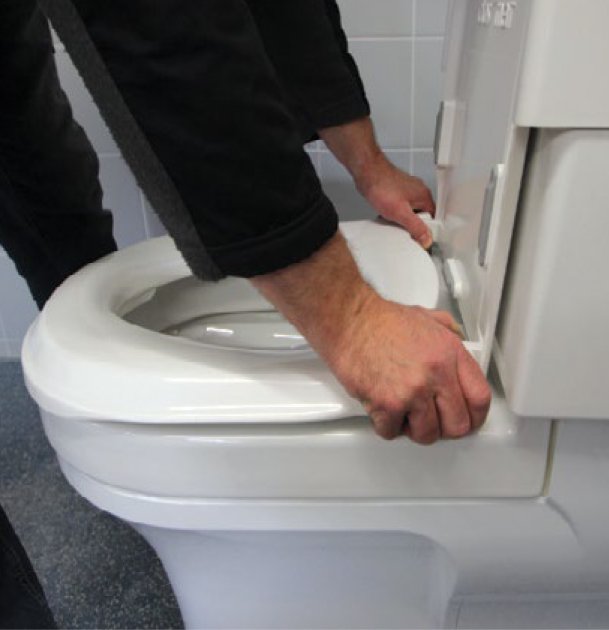
Removing the toilet seat by gripping its outer edges and pulling upwards
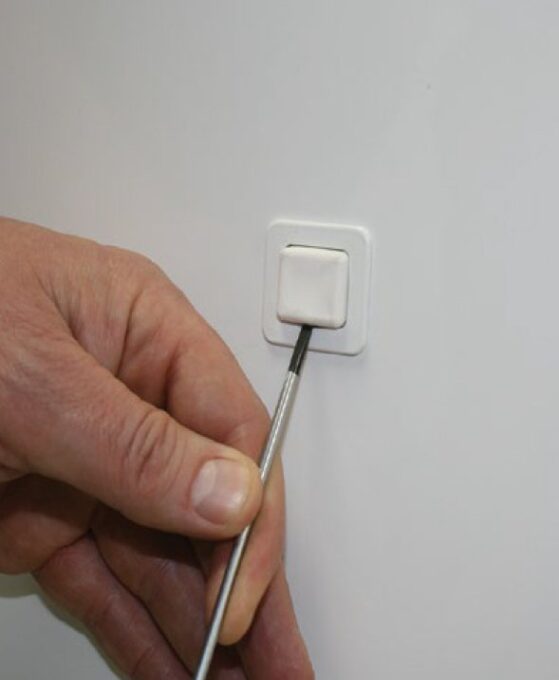
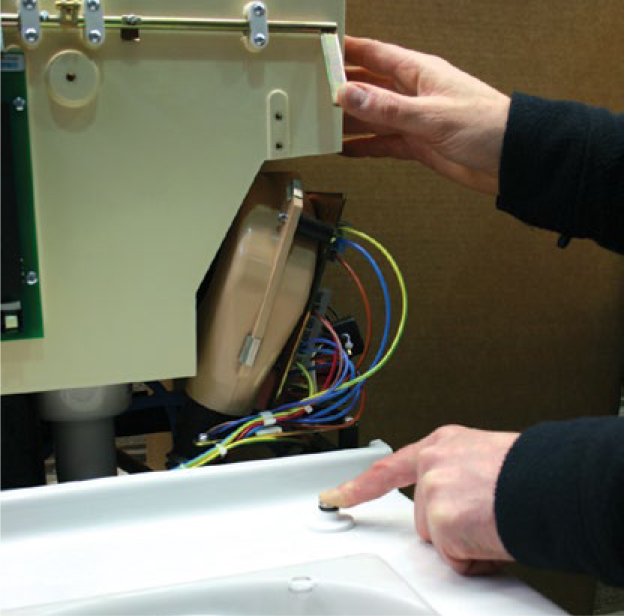
Loosening the covering cap on the cistern cover with a small screwdriver
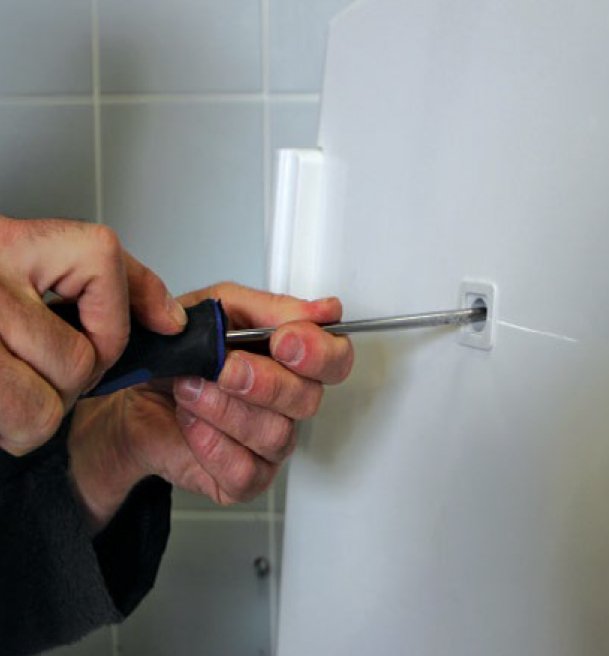
Loosening the cistern cover screw with a screwdriver
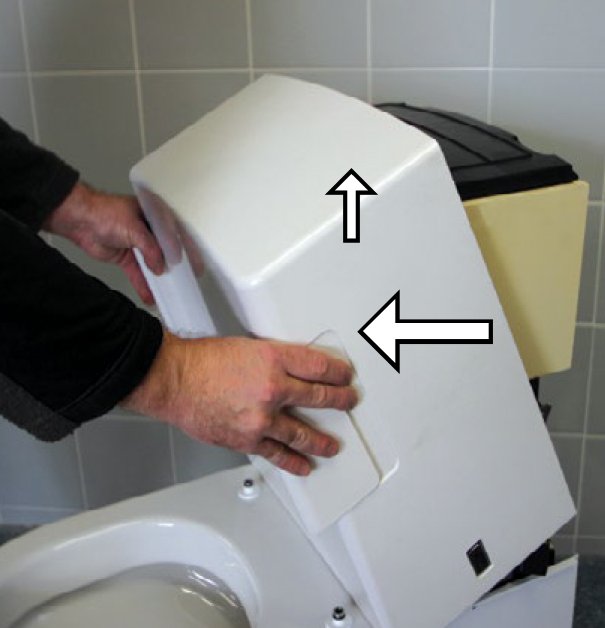
Lifting the cistern cover upwards and pulling it forward, shown with arrows
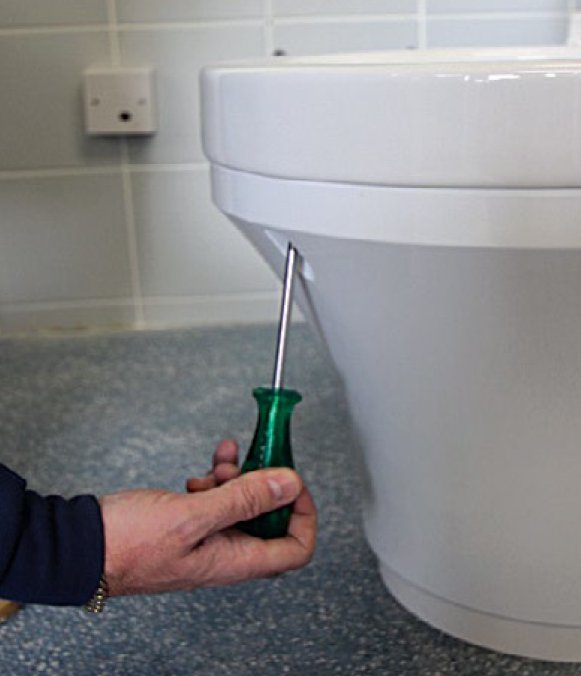
Removing the front screw at the base of the toilet with a screwdriver
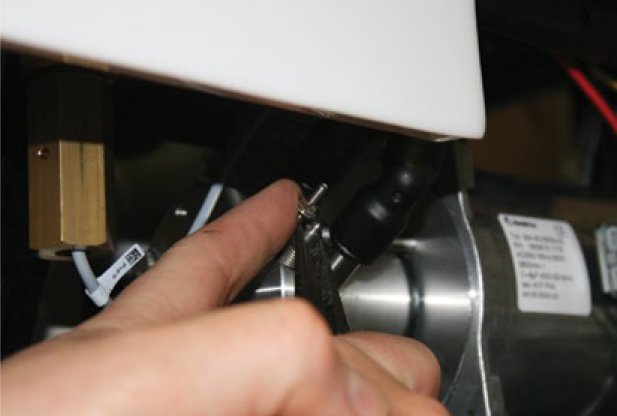
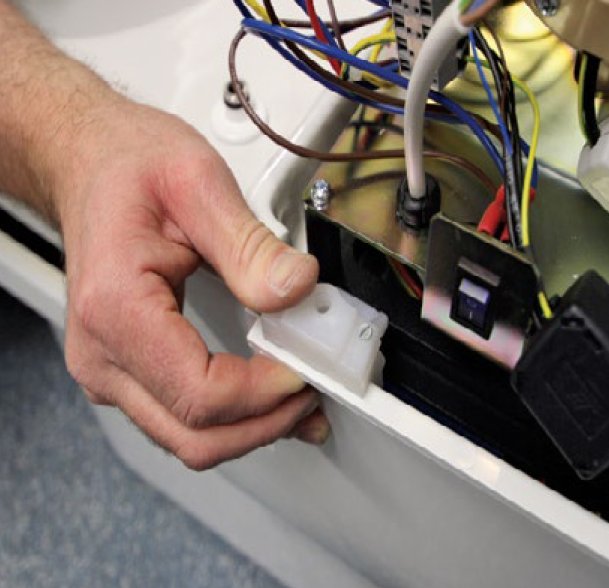
Unhooking a fixing adjuster bracket from the toilet frame
Unhooking the fixing adjuster bracket on the opposite side of the frame
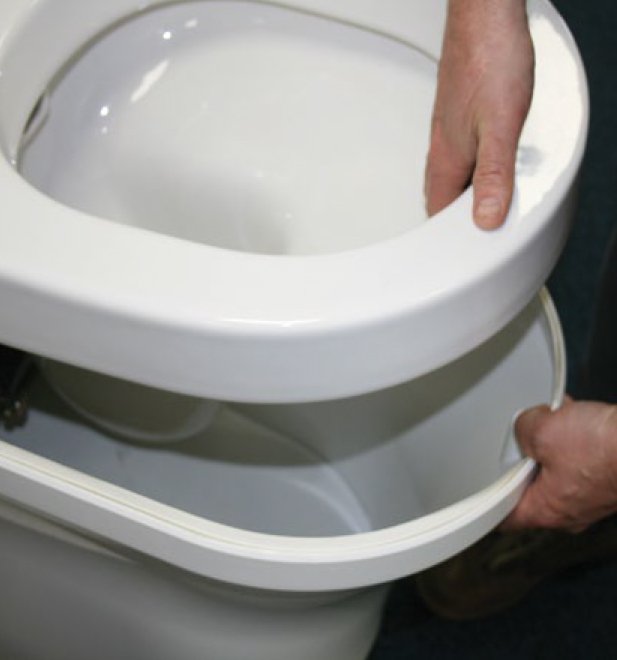
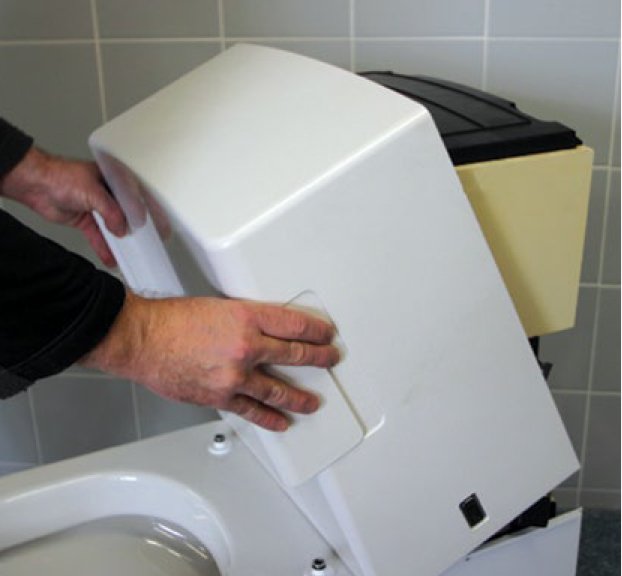
Pulling the bowl cover away from the toilet, shown with an arrow
Installation template laid on the bathroom floor against the wall
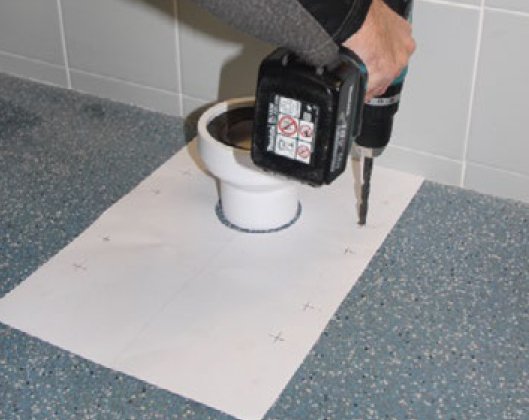
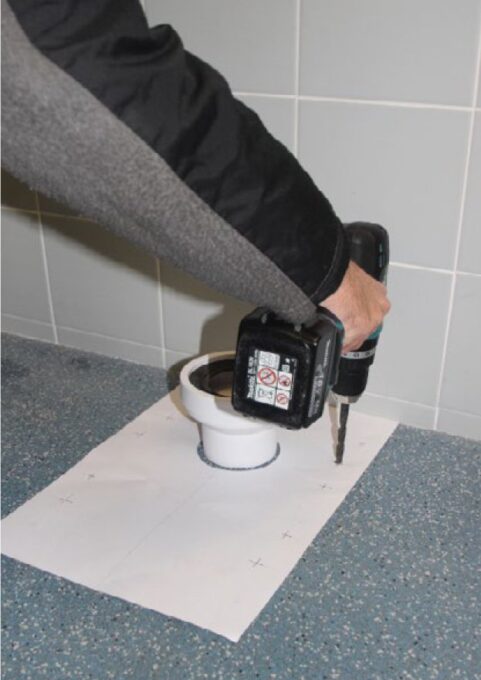
Drilling fixing holes through the installation template into the floor
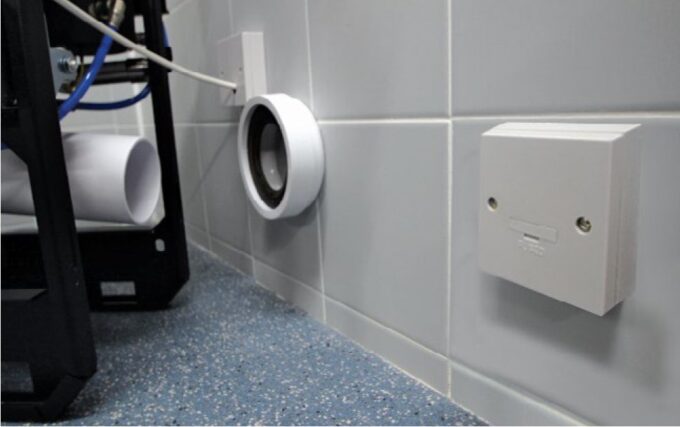
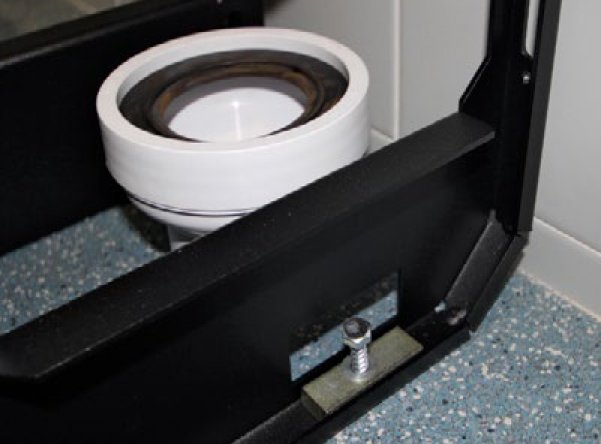
Wall-mounted electrical spur outlet beside the soil pipe connection
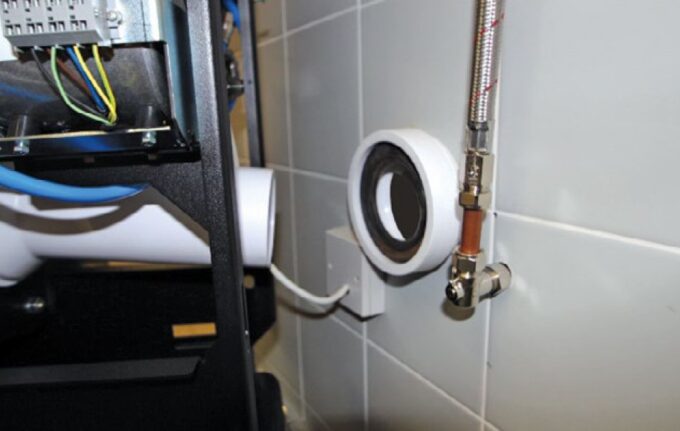
Cold water supply pipe and soil pipe connection at the rear of the toilet frame
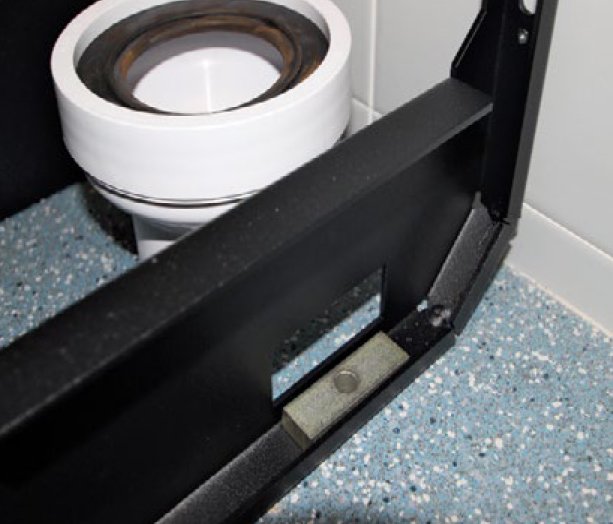
Toilet frame positioned over the soil pipe with an anchor block in place
Securing the toilet frame to the floor at its fixing points
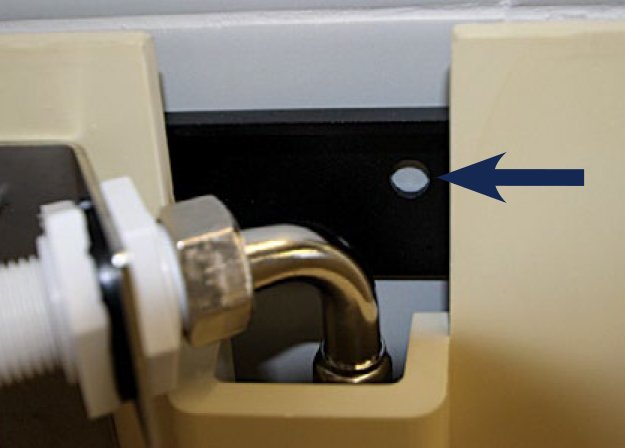
Rear wall fixing point on the toilet frame, shown with an arrow
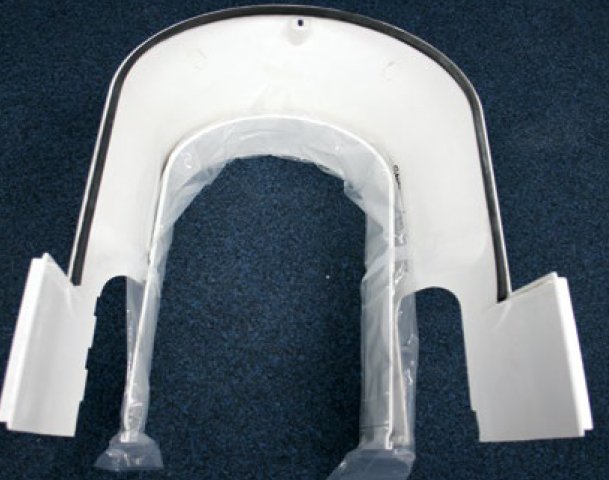
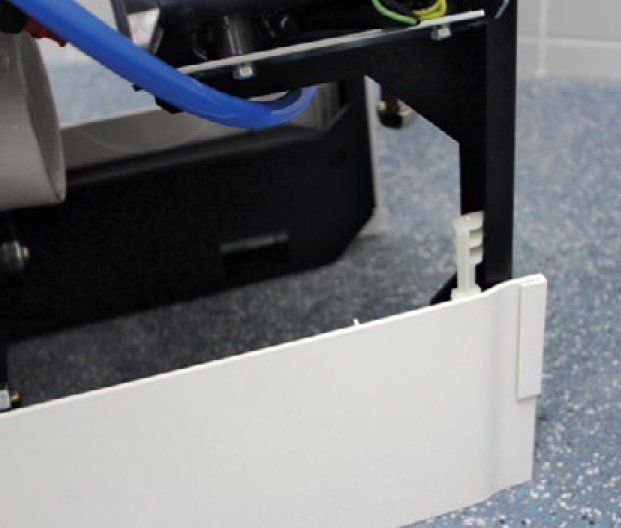
Lower skirt with skirt locators fitted, ready to go around the toilet base
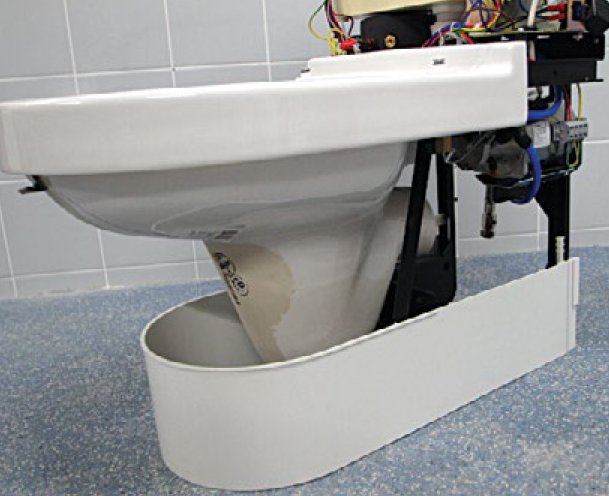
Placing the lower skirt around the base of the toilet frame
Skirt locator engaged with the toilet frame
Step 1 of 19
Lifting the Closomat Palma Vita out of its packaging by the flushing edge and rear frame

To lift the Closomat use the porcelain flushing edge at the front and the steel frame at rear, and lift it out of the bottom of the packing.

Removing the toilet seat by gripping its outer edges and pulling upwards

Remove the seat – Open the lid. Press and hold the seat pivots together with both thumbs whilst firmly gripping the outer edges of the seat. Now pull upwards sharply.

Loosening the covering cap on the cistern cover with a small screwdriver

Carefully loosen and pull out the covering cap on the cistern cover.

Loosening the cistern cover screw with a screwdriver

Loosen the screw of the cistern cover completely, but do not remove it.

Lifting the cistern cover upwards and pulling it forward, shown with arrows

Gently lift the cistern cover upwards (small arrow) and then pull it forward and off (large arrow).

Removing the front screw at the base of the toilet with a screwdriver

Loosen and remove the front screw.

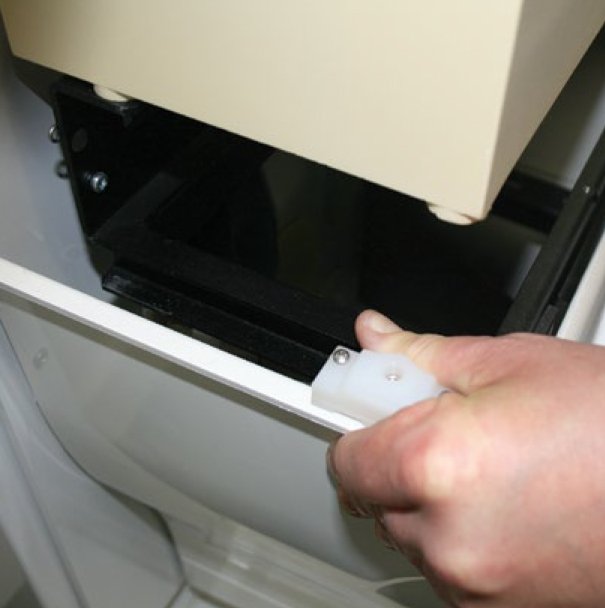
Unhooking a fixing adjuster bracket from the toilet frame

Unhook the fixing adjuster brackets from the frame.
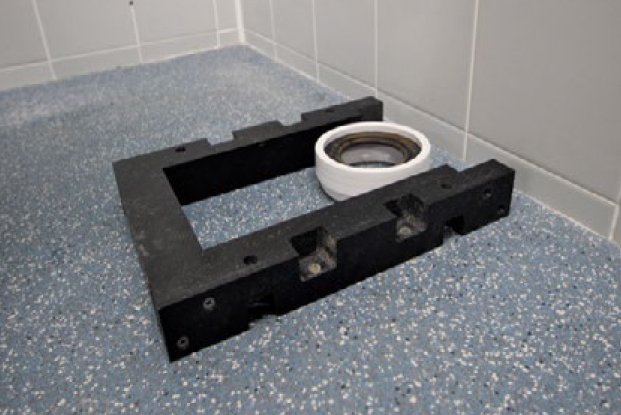
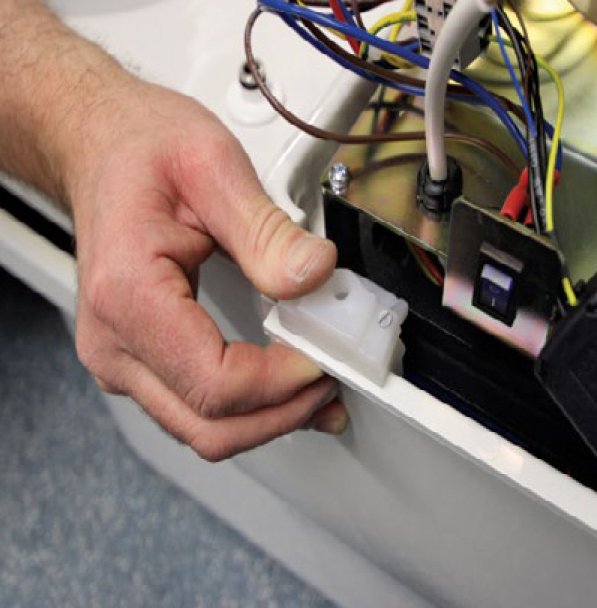
Unhooking the fixing adjuster bracket on the opposite side of the frame

Repeat unhooking on opposite side ensuring cover is free.
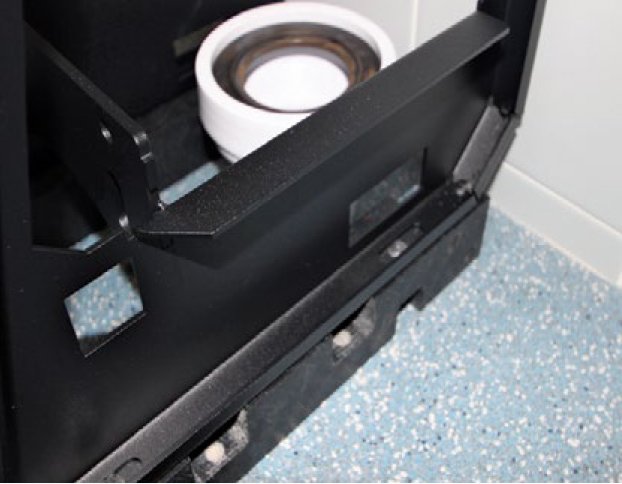
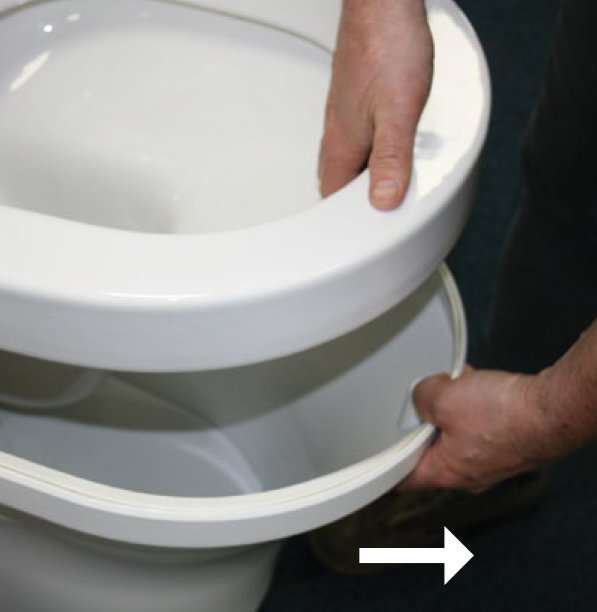
Pulling the bowl cover away from the toilet, shown with an arrow

Pull away cover once adjuster brackets are loose.
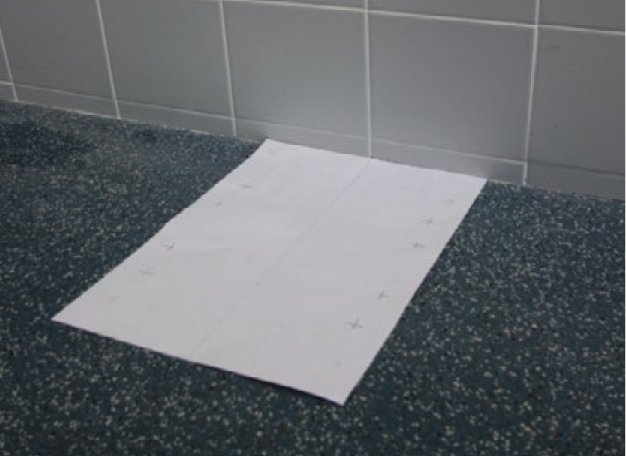
Installation template laid on the bathroom floor against the wall

Using the template provided proceed to set the Closomat’s position in the bathroom.

Drilling fixing holes through the installation template into the floor

Drill four holes in the floor to best suit the intended fixings to be used for the application.

PLEASE NOTE: Two templates are provided. One for floor installations and one for wall installations

Wall-mounted electrical spur outlet beside the soil pipe connection

Locate your services, with the electrical isolation positioned outside the confines of the toilet covers. Spur outlet to be located in accordance with current I.E.E. Regulations (Current Edition). If supply cord is damaged, it must be replaced by the manufacturer, its service agent or similarly qualified persons in order to avoid a hazard.

Cold water supply pipe and soil pipe connection at the rear of the toilet frame

Cold water connection is via a 15mm connection pipe at the rear of the unit. We recommend the supply pipe enter the unit through the floor or through the wall. If side entry is necessary then a suitable infill panel will be required. The provision of an isolation valve is always recommended.

Toilet frame positioned over the soil pipe with an anchor block in place

Position the Closomat and place all four anchor blocks in place.

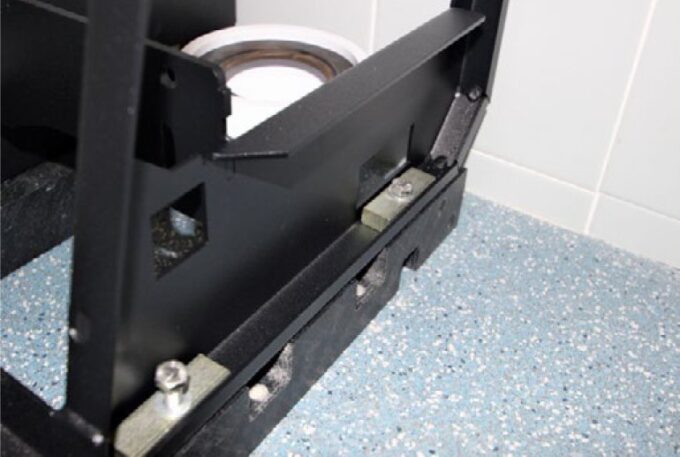
Securing the toilet frame to the floor at its fixing points

Secure the Closomat to the floor using all four fixing points, use suitable fixing for the application. Adhesives are not allowed to be used.

Rear wall fixing point on the toilet frame, shown with an arrow

Anchor the Closomat to the rear wall. This fixing must be used to ensure stability, which is imperative when support arms are fitted.

Lower skirt with skirt locators fitted, ready to go around the toilet base

Remove the skirt from inside the bowl cover and insert skirt locators supplied loose.

Placing the lower skirt around the base of the toilet frame

Place the lower skirt around the base of the frame.

Skirt locator engaged with the toilet frame

Ensure the skirt locator is engaged to the frame.

Test Procedure
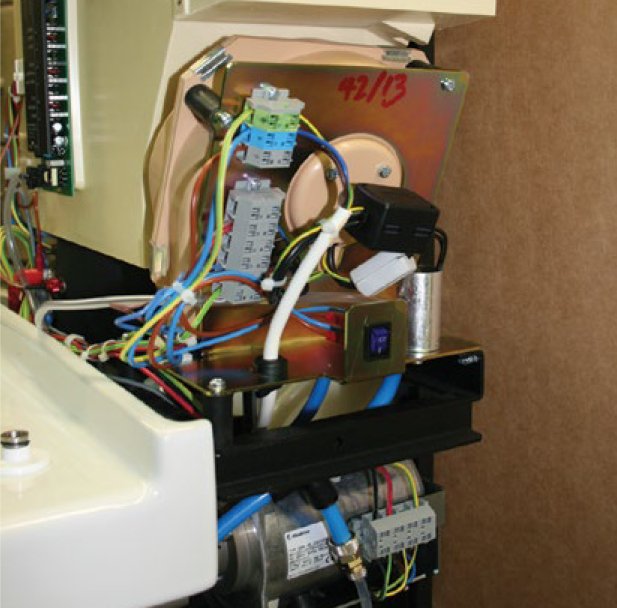
Electrics inside the Closomat with the cistern cover removed, showing the on/off switch
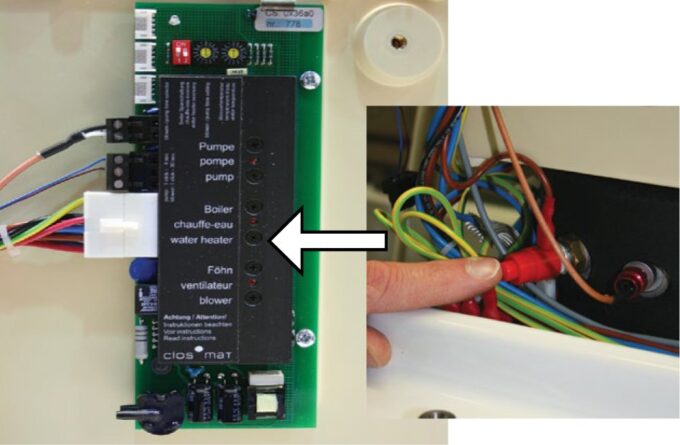
Circuit board with the boiler light, shown with an arrow
Pressing the seat and operation bar to activate the warm water wash
Using the special tool on the douche arm inside the toilet bowl, shown with an arrow
Douche arm fully extended inside the toilet bowl, shown with an arrow
Adjusting the pump pressure on the right-hand side of the toilet
Step 1 of 6
Electrics inside the Closomat with the cistern cover removed, showing the on/off switch

Fill the Closomat with water and switch on mains electricity. Locate the on/off switch and click to the on position ‘I’, the switch will illuminate blue. Check all joints for leaks.

Circuit board with the boiler light, shown with an arrow

Allow approximately 5 minutes for the water to heat in the boiler. Check the circuit board, the boiler light will be permanently illuminated red while the water is being heated to the operating temperature. As the water temperature approaches the required operating temperature the light will flash red. If the boiler light does not illuminate, check the safety stat has not tripped (see inset) by pressing ‘click’ to reset.

Pressing the seat and operation bar to activate the warm water wash

Simultaneously pressing the right hand seat hull and the operation bar will activate the warm water wash. Run the wash for approximately 30 seconds to ensure water pressure is constant.

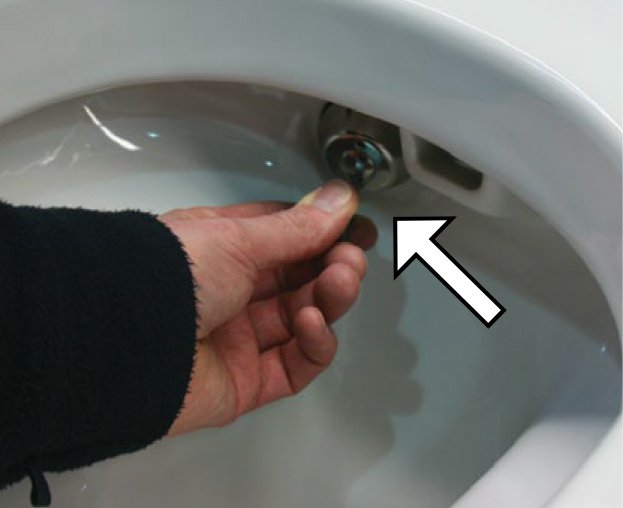
Using the special tool on the douche arm inside the toilet bowl, shown with an arrow

Should the wash splutter during the wash cycle described in step 4, the douche system may need purging to remove any potential air-lock, generated during the unit’s transit/installation. To do this, insert the special tool supplied hook end into the recess at the bottom of the douche arm (arrow).

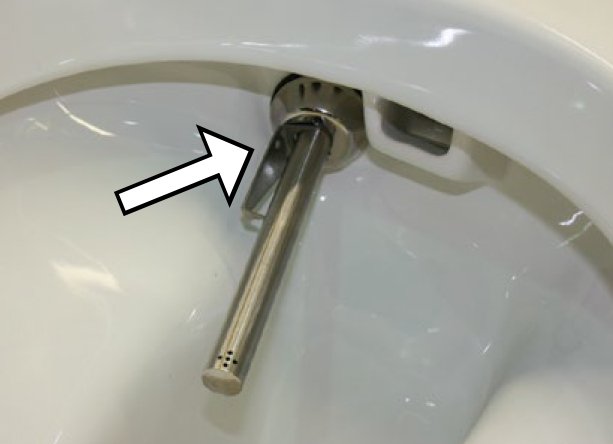
Douche arm fully extended inside the toilet bowl, shown with an arrow

Pull out the douche arm using the special tool, with force against the spring pressure, until the arm reaches its maximum stop. Hold the douche arm with a free hand once fully extended, rotate the tool and locate the tool into the slot and recess in the douche arm to hold in this extended position (arrow). Run wash cycle to purge. Once wash is constant remove tool and allow the douche arm to retract.

Adjusting the pump pressure on the right-hand side of the toilet

Should the water pressure need adjusting to suit the user, locate the pump situated on the right hand side of the Closomat. Hold down or release the pump pressure spring slide by either tightening or untightening the adjacent holding nut. Clockwise will increase the pump pressure, whereas anticlockwise will achieve the opposite.

Check Procedure
Step 1 of 6

Note:

  • Foot switch, hand switch or remote switch, if fitted, will operate exactly as elbow pads.
  • Douche temperature and pressure are preset at factory, and adjustments should only be carried out by Closomat engineers familiar with the equipment.
  • The Closomat will not function automatically if the seat switch is not depressed.
  • The unit should be switched on electrically at all times when in service.

Ensure electrical supply is connected to unit, and switched on: check that correct fuse is fitted.

Ensure water supply is turned on and that the inlet valve is allowing water to enter the cistern and shutting off at correct level. Ensure flow of water is adequate to keep douche supplied.

Ensure rear of seat is depressed.

Keep elbow pad depressed until water runs cold. Keep seat depressed while hot air is operating.

Ensure joints are dry and have not been disturbed during installation.

Finishing the installation
Replacing the bowl cover on the toilet
Hooking a fixing bracket back into position on the toilet frame
Removing the front screw at the base of the toilet with a screwdriver
Replacing the cistern cover so it engages inside the bowl cover
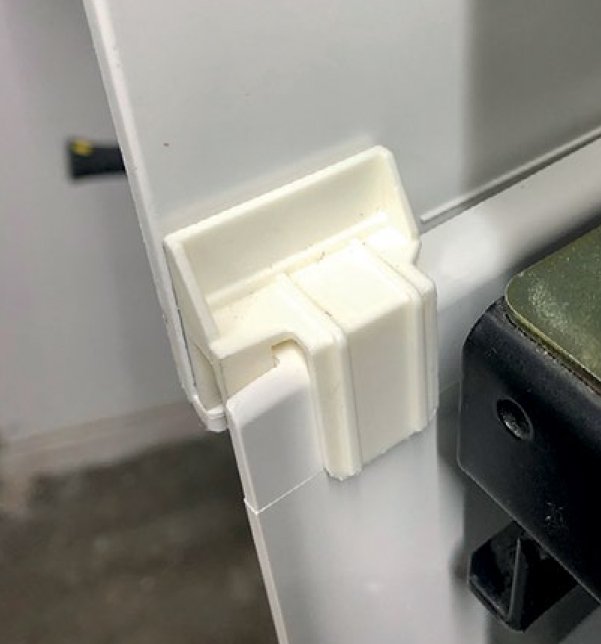
Cistern cover clip correctly fitted, viewed from the rear of the toilet
Loosening the cistern cover screw with a screwdriver
Seat buffer pushed into the cistern cover
Removing the toilet seat by gripping its outer edges and pulling upwards
Testing the installed Closomat by pressing down on the seat
Step 1 of 9
Replacing the bowl cover on the toilet

On completion of installation and test procedure, replace bowl cover.

Hooking a fixing bracket back into position on the toilet frame

Hook brackets into position. Where necessary adjust to provide a water tight seal, adjust the rising block until the seals are tight against the porcelain.

Removing the front screw at the base of the toilet with a screwdriver

Replace and tighten the front screw.

Replacing the cistern cover so it engages inside the bowl cover

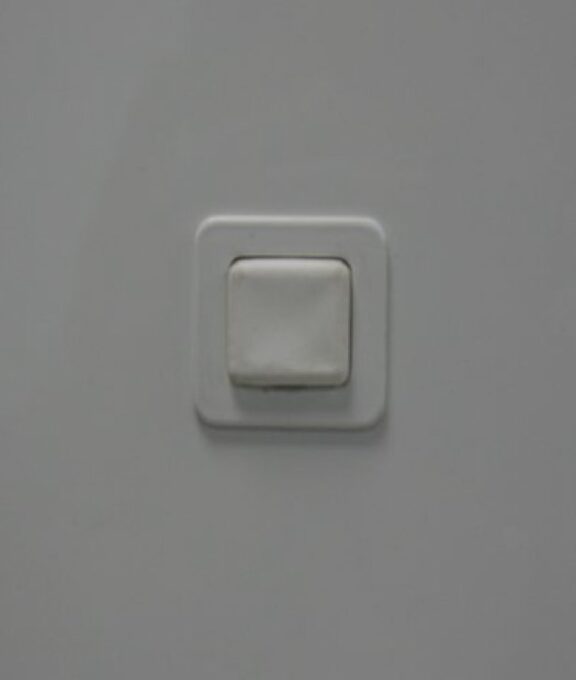
Replace cistern cover. Ensuring the clips on the lower rear edges engage inside the bowl cover and the on/off switch is displayed in the right hand side window.

Cistern cover clip correctly fitted, viewed from the rear of the toilet

Correct fitted position of cistern cover clips – shown from rear of unit.

Loosening the cistern cover screw with a screwdriver

Replace the screw on the cistern cover and carefully tighten.

Seat buffer pushed into the cistern cover

Push in the seat buffer on the cistern cover.

Removing the toilet seat by gripping its outer edges and pulling upwards

Replace the seat by locating the ‘seat pivots’ into the seat hulls fixed to the pan – press the seat firmly to secure its position.

Testing the installed Closomat by pressing down on the seat

Complete the installation by testing the Closomat works, by again depressing the seat and holding in one of the elbow pads.

Please advise us of installation address in order that we can
arrange the commission and activate the 12-month guarantee.

Side entry pipes
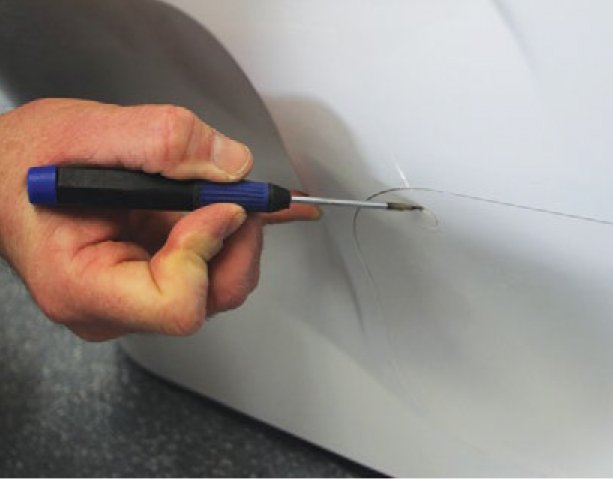
Removing a side panel screw cover with a small screwdriver
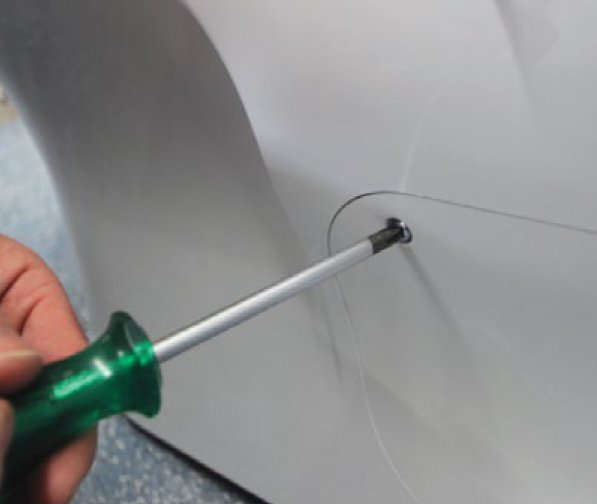
Removing the side panel screw with a screwdriver
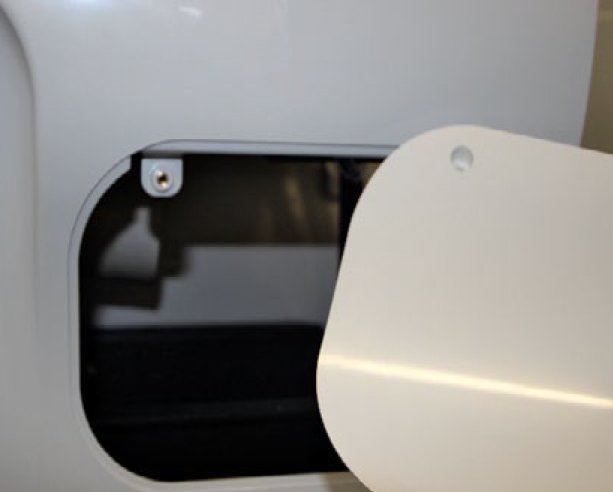
Removing the side panel from the toilet
Side entry pipe fitted through the side of the toilet, with the side panel removed
Step 1 of 4
Removing a side panel screw cover with a small screwdriver

With a sharp implement, remove the side panel screw covers.

Removing the side panel screw with a screwdriver

Remove the screw and set aside.

Removing the side panel from the toilet

Remove the side panel.

Side entry pipe fitted through the side of the toilet, with the side panel removed

Install the side entry pipe scribing the side panel to suit each location, refit the side panel and screw covers on completion.

Installation on a plinth
Drilling plinth fixing holes through the template into the floor
Plinth secured to the floor around the soil pipe
Toilet frame positioned over the plinth
Toilet frame anchored to the plinth with its fixing blocks
Step 1 of 4
Drilling plinth fixing holes through the template into the floor

Using the template provided, locate, mark and drill four holes for the plinth in the floor to best suit the intended fixings to be used for the application.

Plinth secured to the floor around the soil pipe

Secure the plinth to the floor using all four fixing points, use suitable fixing for the application, prior to installing the Closomat.

Toilet frame positioned over the plinth

Locate the Closomat over the plinth.

Toilet frame anchored to the plinth with its fixing blocks

Using ALL four blocks anchor the Closomat to the plinth.

Working with an Infill Panel
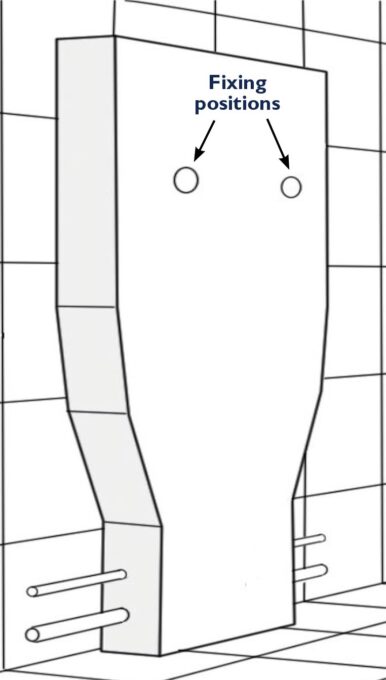
Diagram of the infill panel behind the toilet, showing its wall fixing positions

The infill panel has been designed to aid installation where pipe-work inhibits the Closomat toilet from being located against the wall.

The infill panel is available in thickness sizes 25mm, 50mm and 75mm. The infill panel is 100mm taller than the Closomat toilet. It must be cut from the bottom to suit the finished toilet height.

How We Support Installers, Contractors & Adaptation Specialists

Product Selection & Compatibility

Choosing the right product is essential to achieving the best outcome for the user.

We can provide guidance on:

  • Palma Vita wash and dry toilets
  • Aerolet toilet lifters
  • Closomat accessories and controls
  • Compatible support equipment
  • Product suitability for specific user needs
  • Replacement and upgrade projects
Bathroom Adaptations & Accessible Environments

Our team understands the challenges involved in accessible bathroom design and installation

Support is available for:

  • Disabled Facilities Grant adaptations
  • Housing adaptations
  • Occupational Therapy recommendations
  • Care home installations
  • Healthcare environments
  • Special educational settings
  • Changing Places Toilets
Layout & Space Planning

Accessible bathrooms often need to accommodate multiple pieces of equipment and varying transfer requirements

We can assist with considerations such as:

  • Wheelchair access
  • Side transfers
  • Carer access
  • Ceiling track hoists
  • Shower chairs
  • Grab rails and supporting equipment
  • Future proofing adaptations
Technical Information & Drawings

Our Technical Resource Library provides access to:

  • Installation manuals
  • Commissioning guides
  • Technical specifications
  • CAD drawings
  • Dimensional drawings
  • Product data sheets
  • User instructions
  • Helping your teams work from the latest approved documentation.
Installation Guidance

Where clarification is required, we can provide product specific guidance relating to:

  • Electrical requirements
  • Water supply requirements
  • Waste connections
  • Product positioning
  • Installation considerations
  • Product adjustments
  • Accessory integration
Commissioning & Product Handover

Correct commissioning is essential to ensure products perform as intended

Our team can provide guidance relating to:

  • Product commissioning procedures
  • Functional checks
  • Product setup
  • User familiarisation
  • Technical documentation
Technical Queries & Troubleshooting

If your team encounters an unexpected issue before, during or after installation, our Technical Team can help provide clarification and product related advice to support resolution

Why Contractors Choose Closomat
  • Specialist expertise in wash and dry toilets
  • Experience across thousands of bathroom adaptations
  • Support for installers, Technical Officers and Occupational Therapists
  • Guidance for Changing Places Toilet projects
  • UK based Technical Team
  • Support throughout specification, installation and commissioning
Closomat technical adviser wearing a headset and working at a laptop

Need technical advice for your next project?

Whether you’re planning a single installation or a large adaptation programme, our Technical Team is available to help you identify the most appropriate solution and access the documentation you need.

FAQ

Where can I download Closomat installation manuals and technical documents?

The latest installation manuals, commissioning guides, technical specifications, CAD drawings and product documentation for Closomat products, including the Palma Vita wash and dry toilet and Aerolet toilet lifter, can be downloaded from our Technical Resource Library. We recommend checking the library before every installation to ensure you are working from the most up to date guidance and product specifications.

What should I check before installing a Closomat wash and dry toilet?

Before installation, review the latest installation manual and confirm that water supply, electrical provision, waste connections, room dimensions and any supporting equipment have been considered. Particular attention should be paid where the toilet is being installed alongside grab rails, wheelchairs, shower chairs or transfer equipment, as adequate access and user positioning are essential for successful outcomes.

Can Closomat help with unusual installation challenges?

Yes. If you are working on a complex bathroom adaptation, restricted room layout, Changing Places Toilet project or refurbishment where access, plumbing or electrical requirements present challenges, our Technical Team can provide guidance on product requirements and installation considerations to help you identify the most appropriate solution.

Can Closomat products be installed alongside ceiling track hoists, shower chairs and other specialist equipment?

Yes. Closomat products are regularly specified as part of wider accessible bathroom adaptations that may include ceiling track hoists, shower chairs, changing benches, height adjustable basins and transfer support equipment. It is important that adequate space is available for both the equipment and the user’s transfer requirements. Product positioning should always be considered as part of the overall bathroom design.

Can a Closomat toilet be installed within a Changing Places Toilet?

Yes. Closomat wash and dry toilets are commonly installed within Changing Places Toilets across the UK. Product selection, transfer space, room layout and supporting equipment should be considered as part of the overall Changing Places design to ensure the facility meets the needs of its users.

Do Closomat provide installer training?

Yes. Closomat provides installation guidance, training resources and technical support to help installers, contractors and adaptation specialists install and commission our products correctly. Whether you are installing a wash and dry toilet in a private home, social housing adaptation, care setting or Changing Places Toilet, we can help you understand product requirements and installation best practice.

Are CAD drawings and technical drawings available?

Yes. CAD drawings, dimensional drawings, technical specifications and product data sheets are available for many Closomat products. These resources support contractors, installers, surveyors, technical officers, architects and bathroom designers when planning accessible bathroom adaptations.

What electrical supply is required for a Closomat wash and dry toilet?

Closomat wash and dry toilets require an appropriate electrical supply in accordance with the latest product installation guidance. Electrical requirements can vary depending on the product being installed, therefore installers should always refer to the latest technical documentation before commencing work.

Do Closomat products need commissioning after installation?

Yes. Correct commissioning is an important part of every installation and helps ensure the product operates safely and performs as intended. Installers should follow the commissioning guidance within the installation manual and verify that all wash, dry and user control functions are operating correctly before handover.

What support is available during installation?

If you need technical clarification during an installation, the Closomat Technical Team can provide support relating to product configuration, installation requirements and troubleshooting. Providing photographs, dimensions and details of the installation environment will help us provide faster and more accurate guidance.

Can I install a Closomat product into an existing bathroom adaptation?

In many cases, yes. Closomat products are frequently installed as part of bathroom refurbishment projects, Disabled Facilities Grant adaptations and replacement programmes. The suitability of an existing bathroom will depend on available space, services and the needs of the intended user.

Where can I order spare parts and replacement components?

Genuine Closomat spare parts and replacement components can be supplied through our team. Using approved parts helps maintain reliability, product performance and warranty compliance, while ensuring the product continues to operate as intended throughout its service life.

How much space is needed around a Closomat toilet?

Space requirements will vary depending on the product, user needs and any supporting equipment within the room. When planning an installation, consideration should be given to wheelchair transfers, carers, shower chairs, grab rails and any future adaptation requirements. Product drawings and dimensional information are available within the Technical Resource Library.

Can an Aerolet toilet lifter be installed with a Closomat wash and dry toilet?

Yes. Aerolet toilet lifters are designed to work alongside compatible Closomat wash and dry toilets, helping users sit down and stand up more easily. Installers should refer to the latest installation guidance to ensure compatibility, positioning and safe operation.